Search This Blog

Monday, March 21, 2011

Coasters


Carolyn and myself are taking a weaving class with Betsy Day from Glover, and this is a practice piece I did with an 8in. by 8in. peice of cardboard. I was able to make two, one on one side and one on the other side. I think they came out really good.


Sunday, March 20, 2011

Practice Weaving

 This little purse will go to my step grand daughter, Grace. She and I did a weaving together and she had wanted something else. For a 6 yr old, these little purses are just the thing to carry who knows what. With the weekly weaving lessons, I have gotten more interested in weaving and so found a way to use up left over yarns from crocheting projects. The many colors and stitches are just the thing for practicing weaving. Notice the snow in the background? Yes, that is our field here in the Northeast Kingdom of Vermont on March 20, the first day of spring. But the sun is ever so warm now and the snow won't last long.

Saturday, March 19, 2011

Winter and Summer Weaving

Winter and Summer refers to the front and back of a woven placemat. During weaving lessons, Kyla and I learned how this pattern was made. We are learning on several different looms and with many different patterns in mind. Starting with putting on the warp, we are preparing 3 different looms for our projects. Watch how our ideas develop of the next few months.

Tuesday, March 15, 2011

Leafy crocheted mobile

 
Imagine a  new born baby named Leafy? Well, it is really Lydia, but her sister (3yrs old) named her Leafy. So this mobile of crocheted leaves and cones came to together today. The twig lettering is just to make the name official, long after the 3 yr old forgets she ever came up with it. The yarn is from short bits that remained after other projects, the beads came from a Johnson, VT bead shop, and the twigs are from the yard. I couldn't resist the chance to crochet some leaves, after following the directions of Nancy Lewis, fiber artist in St. Johnsbury and the small leaf pattern, thanks to Kyla.

Thursday, March 10, 2011

Tunisian Crochet

Tunisian crochet looks like this in a silk blend yarn. The pattern is called Red Rocks Wrap from Interweave Crochet winter 2010( see pics below). It is kind of a different vest/wrap deal that looks very comfortable and smart. The Tunisian simple stitch is not difficult, I taught myself from watching it done on Youtube. Will post the finished product come spring..... whenever that is????????

Tuesday, March 1, 2011

Punch needle chickadees

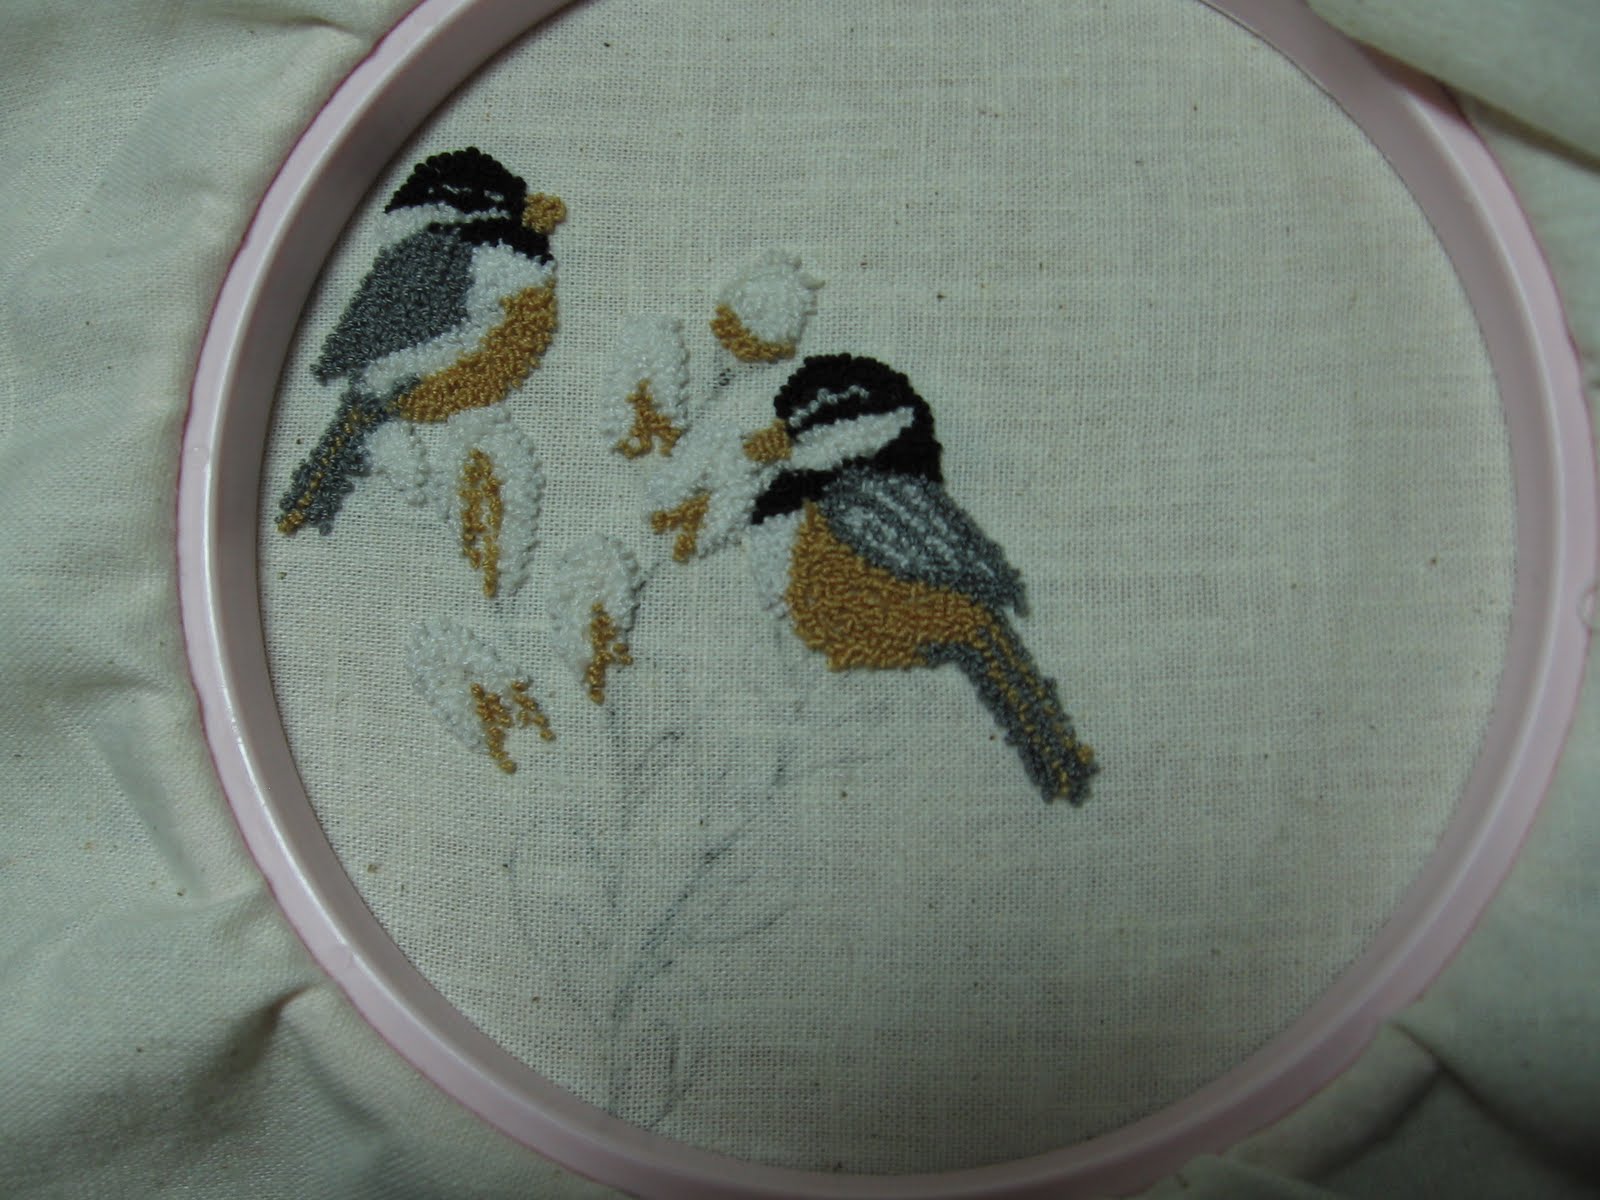
Here is the punch needle embroidery that I am currently working on. In the first photo you see the front of the embroidery, however, the work is done from the back, which is actually on the top of the hoop.
This photo shows the working side of the embroidery along with the punch needle tool. There are 4 sizes of needles which fit into the tool. Here I am working with the smallest size. In general, the larger the project or design, the larger the needle and floss or yarn.
To make a punch needle embroidery, first a design is transfered onto weavers cloth and then following the design, the needle is punched through the cloth in neat rows. The basic technique is fun and easy to learn and as you can see...creates beautiful works of art!

Saturday, February 26, 2011

Flying Rabbit Punch Needle

The thing I like best about punch needle embroidery is it's so easy to create and use your own designs. Then the finished designs can be made into many various items.

The technique is similar to rug hooking but on a much smaller scale. In my next post, I'll share some of the tools and a work in progress...

Birch Roosters Begin


This is the way it was. Kyla showed me a TV program that she had recorded on the DIY cable channel. The show was Woodsculpting and featured Chris Lubkemann, an extraordinary whittler/wood carver. He demonstrated how to whittle roosters from small branches. Here is the book he wrote and here is my first attempt. Not beautiful, but it does look like a rooster. I work with gray birch all the time, as you know, and in fact this rooster is made from, you guessed it, my  Xmas/Valentine's tree!!! Talk about recycle! There will be many more of these to come. The key is a sharp knife. And just a pocketknife will do. The roosters are usually painted in bright colors, and mounted on something, block of wood, etc. But for a first try, I think it looks like one. You can see the work of this carver at http://www.whittlingwithchris.com/

Tuesday, February 8, 2011

Valentine Tree

Here  you see the Valentine Tree with the hearts and read apples, strawberries and birds. This is a gray birch from the edge of the field. It was the Christmas tree until Feb 1. The ornaments are placed with a very long fishing rod. Apparently spring will come early this year, but from the looks of this picture, you wouldn't know it. Happy Valentine's Day!

Wednesday, February 2, 2011

Green Hearts for Valentine's Day


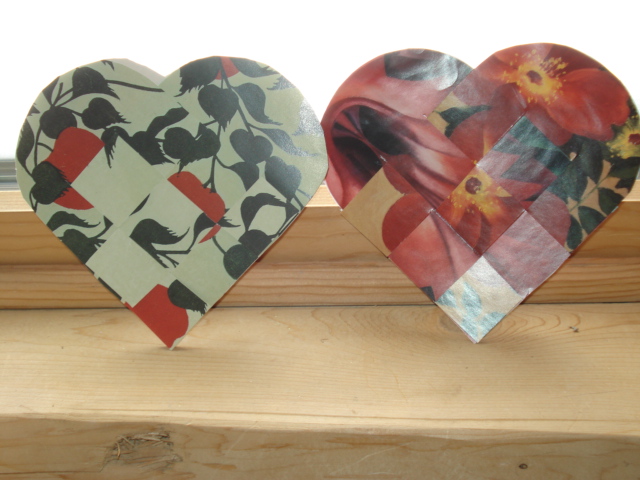
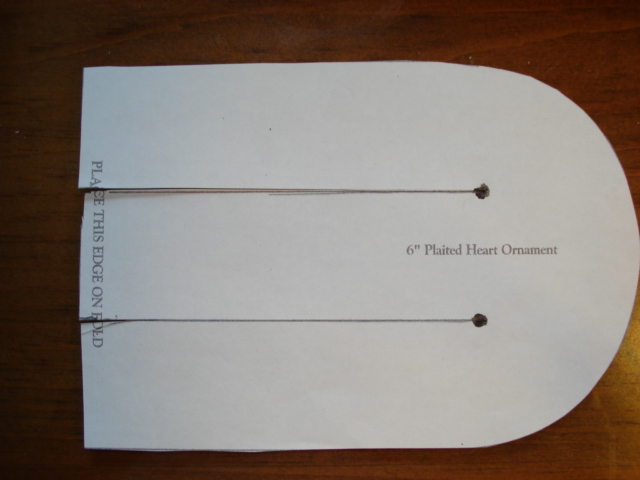
 What to do with your 2010 calendars? Here is something. Make green Valentines! This is the same pattern that Reba posted a while back. It's two half hearts woven together. Take your calendars and place the pattern over the print in such a way that the heart will show the picture.  Finding the red colors for the holiday was easy. The backsides are red wallpaper from the book of samples that I bought for crafts. These will all go on my gray birch EX-christmas tree, still standing with only red ornaments left over from the holiday. So this is really a green valentine's idea. See the pattern below. Have fun!